Monday 19 September 2011

The finished piece!

My finished poppy piece (just a quick pic, so not the best quality!). The cord is a lovely silk dip dyed affair (orange and brown- reminded me of poppies) from the Little Bead Shop http://www.thelittlebeadshop.co.uk/
Next onto Elegant Meadow Pods.....
and do stop by my Facebook page Jewellery by Emma Rose

Saturday 3 September 2011

Repousse in metal clay with Holly Gage

From Prague to Edinburgh.....
4 wonderful days with Holly Gage and our hostess Emma Baird from the Little Bead Shop in Scotland.
After an incredibly stressful train journey we finally arrived in Edinburgh having travelled to Manchester Piccadilly and found our onward train (and all later trains) had been cancelled due to a strike. Which had we had to discover from the information point. So a different train to York...the scenic route (!) to Edinburgh via Huddersfield, Leeds and more, then change again.....we spent hours on trains and finally crawled into Edinburgh around 8 hours after we left home. Our hostess at the B&B had thankfully stayed up (in her jammies) to let us in! I could have slept for a week. Fortunately the prosect of Holly's class was enough to make me spring out of bed (well, almost, I'm not a natural morning person anyway!) grab my kit and walk my way over to Bruntsfield where the workshop was taking place at the home of Art Clay Scotland, the Little Bead Shop, a gem run by Gil and Emma Baird.
Repousse in Metal Clay
Being primarily trained as a metalsmith I appreciate the intricacies of repousse/ chasing in silver. And quite frankly I can't be bothered to mess around with pitch and hammers. So I was very intrigued as to how Holly's process for making such intricate detail worked. She had brought a large collection of stunning pieces to gawp and drool over showing everything from a place she did a workshop in France to some Koi in a small pond. Every piece had a charming history behind it....even the squash flowers which were going to be dinner, but also turned out to be the intended feast of a wee little beastie (who also featured in the finished piece!). The high level of craftsmanship and the integrated nature of the fixtures and fittings were also noteworthy. A considered bail does much for a piece.
A prerequisite of the class was to bring drawings, sketches or photos from which to work a design. This part of the class and Holly's encouragement of individual design consideration meant that the work became uniquely our own and not a Holly " replica " which was fantastic. One of the other workshop participants was an artist and had brought her own amazing drawings of a robin and a horse. Others had brought diverse inspirations from dragons to Art Noveau. If you felt uninspired by your own handiwork then Dover copy right free books were an excellent choice.
I had been working on a sketchbook of Poppies anyway from some youth workshops I had been doing with the idea of translating them into felt (see previous post). So it felt natural to expand on that idea while I was on a roll and I had done some more original sketches and some manipulation of photos in Photoshop too and added them in. (It also kept me busy on the long train journey!).


 There were some interesting shapes and patterns in there I was looking forward to translating into clay. First though some consideration of scale and which parts of the image to use....and lucky us, Emma became our go fer and ran down to the post office to photocopy and rescale our imagery! Some tracing later I was ready to go with my poppy design, an abstracted close-up of the central pod and stamens.
Next that design was to be translated onto polymer clay to make a mold to start the repousse image from. Other than that I am not going to give away any of Holly's secrets of this part of the process- you'll just have to take one of her fabulous classes!!!! With our mold then used to impress the metal clay we had a firm starting point for our masterpieces. 

Though there was some discussion of work having an "ugly" stage to get through (personally I loved what everyone had acheived). Well onto day two we worked on refining and finessing our work Holly is really big on the tiny details, and it does pay off in the work and the intent of the piece. I am suffering tool envy and my first purchase has got to be some micro carving tools made by Dockyard, they and a set of mini needle files (yes they make smaller needle files!) proved invaluable. And conical clay shapers are the way to go...plus there were a few homemade tools thrown in the mix too. By now we are onto texturing and adding minute details to the artworks. Everyone's pieces look amazing...there is a robin, a seagull, dragon, art noveau lady in the moon, a tree on a windswept moor (very Heathcliff) art noveau twirls and flowers and a Monetesque statue in a pond. They are all so different and very lovely.
To see more Art Clay Scotland's facebook page- photos from the workshop.The curve of mine part slumped during firing so I have to figure a way to get it back again before I take pictures (it always goes wrong at the last minute when there is no time to fix doesn't it!). I highly recommend Holly's class though, she is very talented and enthusiastic and in no way is it a paint by numbers experience, it is all tailored to indviduals needs and levels. Will post the finished piece shortly, meanwhile check out Holly Gage's website.....www.hollygage.com

Wednesday 31 August 2011

Felt like Heaven....Peckham workshops part two.


A two day workshop, aiming at little bags made from felt and inspired by summer meadows or gardens. Not surprisingly none of the group had done their "homework" to do sketches or bring pictures, so we printed out some ideas. I, at least had done mine and brought my sketchbook with some poppy pictures (which are "sick" apparently!!) so maybe in future they will be more encouraged. So after some sketching and planning of an idea, it’s on to cutting out templates and learning to lay felts (and a bit of, step away from the bright pink fibres, they weren't in your original sketch!!!). Once we have the basic designs down we add some additional fibres such as wool and lace. Then comes the water, soap and invariably chaotic fun! After making the bags on day one, day two brings embellishment, handles and some chopping and repurposing! Also I am making felt pictures with a few students who booked but didn't turn up on day one so at least they have done something, which means some running around (thank goodness for Louise holding down the embellishment side!!). I am certainly going to be sleeping well tonight- hope the students do too!

Tuesday 30 August 2011

Youth Workshops in Peckham

An interesting start when the day you should be working is the morning after the riots the night before, but being pigheaded and persistent I am determined not to let my students down I plunge straight into civil unrest land...and its eerily quiet. Apparently rioters don't do mornings. And everyone more sensible is staying behind closed doors. So I am enjoying the lack of traffic, an easy drive for once!
5 days of activities planned over two weeks. We are recycling old jewellery, making stretch bracelets and illusion necklaces and some funky contemporary polymer name badges during days 1- 3. After that the focus is switching to textiles and we will be felting some little bags and/or pictures and embellishing them. The group is aged 10-16 so quite a range. My wing woman for the week is the coordinator at VAPA, the lovely Louise, a talented artist in her own right (and how she manages to follow all the instructions, make lovely pieces and keep an eye on a bunch of young people I'll never know!)
Recycling old jewellery.
A couple of the students have managed to bring some things but that is all, so it was lucky I had raided my own jewellery box and persuaded my Mum to raid hers too! Also on the table are ribbons, buttons, findings and new beads. Taking one or two pieces of old jewellery we get the sketch books out and proceed to plan. This is a great one for odd earrings or broken pieces as well as stuff that isn't worn any more. The sketchbooks encourage consideration of dismantling pieces and how the parts could be used before we move on to adding fresh materials. My sample piece is made from a dismantled single earring, an old watch bezel and a button is added for balance. The result has a very Art Deco feeling. The students get to work on breathing new life into bracelets, earrings and necklaces by transforming them into new wonders.
Beading.
Day two brings stretch bracelets. We talk about colour combinations (and I encourage the pick one, two or at most three to try and encourage the " it isn't necessary to throw everything at it" approach!!) and using smaller beads so that the piece doesn't become too heavy. Then after a demo of headpins and coiling we are off...this one is going to keep them occupied for a while....it takes a considerable amount of time to get round the bracelet. By the end most of them are experts in coil making and threading and the bracelets look great. In the time remaining we make some quick illusion necklaces.
Polymer Clay.
Last time we covered some basic caning, marbling and some funky shaped necklaces. So this workshop we followed on with some more canes. We made checkerboard canes, zipper canes and more; with some more discussion about colour use (I learnt the hard way on that one!). We also looked at using gold/silver composition leaf. This was followed by applying them to sheets of clay in a considered way and using letter cutters to create the funky names for our badges! After baking we attached them to kilt pins using chains and brass charms to make them even kookier!
this post will be edited when I get more imagery!

Friday 1 April 2011

Interlude

Before I finish off describing the conference I thought I would briefly revisit Prague and some of the gems I discovered in their Decorative Arts Museum.
A pilgrims brooch from 11th century I think. Collecting badges was a hobby even back then!

A bishops ring. It wasn't a modern thing to be avant garde and set the stone upside down!
A flea ball. I kid you not. Placed under the skirts to repel fleas. Bigger one available to repel unwanted male attention !(Ok so the last bit was an April fools).
Lovely stone set necklace (Czech garnets?)- again the design looks modern.
A lovely gold and pearl art noveau necklace.

Thursday 31 March 2011

EU conference day three....part two

While Roswitha is firing our wonderful creations (did I mention how excited I am about those stones!!!!) I pop next door to have a peek at Carol Douglas's workshop Copper Dreams. I wish I could be in two places and take both classes. Carol's pieces are wonderful creatures from the world of faerie and I love them! Her patina's are wonderful too. Fortunately she teaches here in sunny old England, so I will be sure to be tracking her down for a class!

See more of her work (and better still book her for a class) at http://www.silvershadowsjewellery.co.uk/

Wednesday 30 March 2011

EU conference day three....

The final day (with an hour less sleep due to the clock change!!!) dawns bright and sunny again.  Its time for the Swarovski crystal workshop with Roswitha Schwarz. Roswitha has some beautiful samples of her new techniques developed in collaboration with Swarovski (would had never heard of metal clay! tsk,imagine that!!!). Apparently they cut "real" gemstones too (and believe me the quality and depth of colour is fab) and have some jewel set chain (again, I have seen this with base metals and synthetics, but never sterling and semi precious) and pre set stones. I am so excited as the results look stunning. I am also thrilled by Roswitha's designs - her style is very clean and contemporary yet beautiful and shows the stones to maximum benefit.


My photos don't do them justice. Suffice to say the stones are easy to work with. The tiny stones in the preset bezels give a wonderful delicate finish and the jewel chain gives a completely new look. We used photopolymer moulds to create the design. I have used the yellow photopolymer plates before but they are quite thin, these were Imagepacs and about 2.5mm thick red ones supplied as a gel sachet. Needless to say I will have to buy some to experiment with!
I am so excited about these stones and can't wait to buy some! hopefully we will hear more about them here: http://www.rosart.de/

Tuesday 29 March 2011

EU conference day two....part three

The afternoon (after a coffee break- I can't even look at the pastries, sandwiches and ice cream!)
sees Jana Vesela teaching Antique Enamelling applications.
Another lovely lady (I forgot to ask what her PhD was in!) she had thoughtfully provided not only three colours of enamels but tiny little pots for mixing. Here are a couple of her wonderful works:

We made basic pieces and then learnt how to apply the enamels and torch fire them which was fun.


Here are my two pieces.


EU conference day two....part two

The beginning of the afternoon (after a seemingly un-ending buffet lunch- several mini desserts are lower calorie than one big one right?) sees Pam East's presentation on enamelling copper clay. The work is beautiful and the enamel colours very bright. It is interesting to hear how the different brands of copper clays need different handling. Pam is both enthusiastic and highly dedicated to her areas of expertise and the amount of research she has done is quite astounding (and makes life so much easier for the rest of us!)
If you ever get a chance I would take a class with this lady, I guarantee you wouldn't be disappointed. She also has a great book on enamelling on metal clay and some coloured coded metal clay slats (I have had some for ages and love them!) See more at http://www.pameast.net/

Sunday 27 March 2011

EU conference day two....

I am tired already ...bed time was late due to slooooowwww service in restaurant!
My first class in sgraffito on glass with the lovely Astari Swatantri from Finland. She provided us with black glass cabochons and then proceeded to make bezels/pendants from the metal clay which we then dried and refined. Then came the fun part of applying some overlay paste in a even layer for which Astari had created a clever method. It soon dried and we were free to scratch in patterns using some special tools from Japan.
Astari has written a book too, and won awards from the Japanese art clay competition

Friday 25 March 2011

EU conference day one masterclass part 2

First a few more pictures from this afternoon.
dragonfly with mother of pearl wings

filigree syringe pendant

filigree ring

This evening, a brief opening speech by Herwig Schwarz, and then Mr. Kawai (head of Aida's overseas division). He brought a tear to our eyes and his own as he thanked the world for helping in Japan (119 different countries offered aid) and said that knowing they were not alone was a great comfort. There were hints of what they are working on (mokume gane was mentioned) and the unfortunate news that a substantial price rise is coming to metal clay (please don't buy up all the stock before I get home!!!). Apparently they could sell the silver they reclaim for more profit than they make from metal clay!
And finally (with champagne) a presentation from Swarovski. We learned about the history of the company (started in Czechslovakia not Austria!) and their current developments. They cut semi-precious gems as well as crystal and zirconia and have been working on combining their products. They have developed new cuts- I love the fan cut. http://www.swarovski-gems.com/#/fan-cut
We also had some sneak previews of trend forecasts for 2012 (only now being revealed in Basel, and not offially launched for awhile.) Here are this years forecasts: http://www.swarovski-gems.com/#/trend-research-1 (This post will get rather long if I go into next years, but if you want to know, email me, or check back at their sie soon- you get pictures that way!).

EU conference day one masterclass

So day one arrives and I am half asleep it feels like 6am at 7am due to time differences and I spent half last night climbing a very big hill as the funicular wasn't working. The sumptous breakfasts (everything you can think of) and copious amounts of coffee later its time for the masterclass in filigree with Ryoto (last minute change of teacher due to events in Japan). It wonderful to put some more names to faces (and to discover I am not the only one still asleep and making silly mistakes). Every person I meet has some incredible work of art masquerading as jewellery on them...
As usual the samples are wonderful and Ryoto makes it look easy and Mai translating makes it sound easy....we are making snakes of clay using slow tarnish clay to go round a provided mould. I can do that, so far, so good.....then some base pieces of clay for support, check...and then it gets tougher....yes (drum roll) out come the syringes, built layer on layer (some swearing under the breath is heard in various languages). We are making vine patterns, smoothing and shaping. You will have to excuse the photos of my work...I am sure it could be much better!
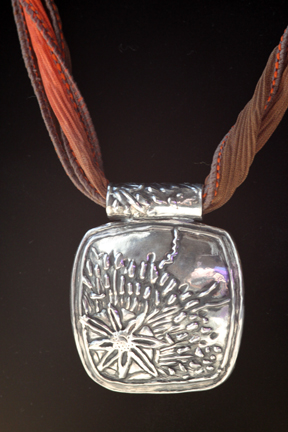
The pendant bail is an Art Clay exclusive one, a nice design. I am picking up lots of tips on using overlay piece to get better joins between metal and the clay/syringe. So base done its on to flower petals. We are using pre-twisted filigree wires to speed things up and we manipulate it with pliers and make joins and finish with both overlay paste (OSP) and ST syringe. (shown below)


Having managed the first syringe part it gets more difficult...we have to make leaves just using syringe strokes, directly on the piece (not much you can do if you make mistakes!). It is nowhere as easy as Ryoto makes it look. This is his piece (I am not showing you mine no matter how much you beg!!!)
Then it is time to add the petals in two separate layers and some small balls of clay for stamen. (gratifyingly this hides the two bottom leaves!).

Again not my one ;-) As you see there is also now some syringe around the interior and exterior frames to give a twisted effect. Action shot coming up.....

So now they are ready to fire.....
and we are shown alot of other pieces using the technique. They are incredible (we are not worthy is murmered....)

More to come but for now its back to the fray for opening speeches and swarovski presentation (oh and some dinner though after the lunch and tea breaks...so much food... they will have to roll me onto the plane home!)

Thursday 24 March 2011

A taste of prague


I've arrived for the art clay conference in Prague! Today was spent wondering around in the sunshine enjoying the sights including the wonderful astrological clock above! Tomorrow the metal clays starts... I have already met the charming Pam East and her husband and run into Angela....the metal clay celebs are gathering!

Saturday 12 February 2011

Valentine by name

I have long been a big fan of Shahasp Valentine's beautiful organic forms made using metal, gold, pearls and gem stones.  And what better than a Valentine on Valentines?
Organic Ring #36, fine silver and 24k gold precious metal clay with square cut white sapphire and pearl
Fantastic subtle forms and textures, great rhythm and composition and use of gold. Do check them out!
Habitat Ring #3
Wave Necklace #20, fushia sapphire, two pearls and 24k gold accent

Tuesday 8 February 2011

A little colour

One of my favourite things in jewellery is colour....whether that be gemstones, resin, enamel,  anodising or textiles.....or even boxes and display.
how to combine colours is always an interesting one.  Landor runs a blog with thoughts on "brands and branding". (I intend to explore further). But for now they have an interesting post of colour palettes drawn from pictures- great combinations to use yourself or give you ideas how to find your own. I am thinking photoshop and an eyedropper to pick colours!
There is a generous pdf attached with 40 colour palettes to get you going too!
*